
Create alerts
Prerequisites
To create your first alert, you will need at least one source on which you already uploaded data in Opinum.
Important
Alerts will be decommissioned this year, in favor of alarms, which are more efficient and offer greater functionality.
Learn more about alarms.
In Opinum Data Hub, go to the Alerts page and click on the Create alert button. The alert creation pop-up opens. You can now fill all the fields as follows.
General information
Name
Choose a name for your alert. A unique ID will be automatically created.
Data
Select the site, source and variable on which the alert will be set. If a default variable has been set on the source, it will be pre-filled.
Tip
Learn how to select a default variable
Threshold
Define when the alert should be fired
Threshold:
- Low: the alert will apply if the value of the data received is lower than the value
- High: the alert will apply if the value of the data received is higher than the value
Value: fill the value which determines the threshold
Alert type
There are three types of alerts:
Raw: each time a data point is received, the system will verify if the value of the data point is lower or higher (threshold) than the threshold value
Rolling: the verification period is based on a rolling time schedule. Each time a data point is received, the system will verify if a data point, within a specific period defined by “Granularity”, is higher or lower than the threshold value. If in one period specified, more data points are available, the data is aggregated based on your choice at “Aggregated”.
Scheduled: the verification period is scheduled. Two mode of schedules are available, simple or advanced.
Then choose the schedule. By default the simple schedule is selected, to easily set-up the schedule in the interface.
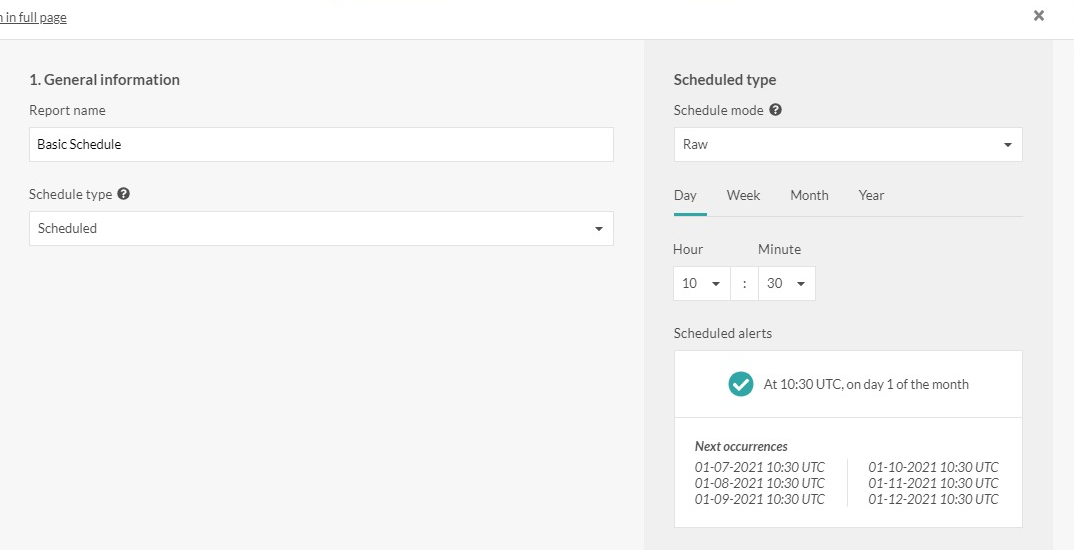
Click on the frequency (day, week, month or year), and configure the schedule. The next occurrences are displayed in the Scheduled reports box to easily check if the configuration is right.
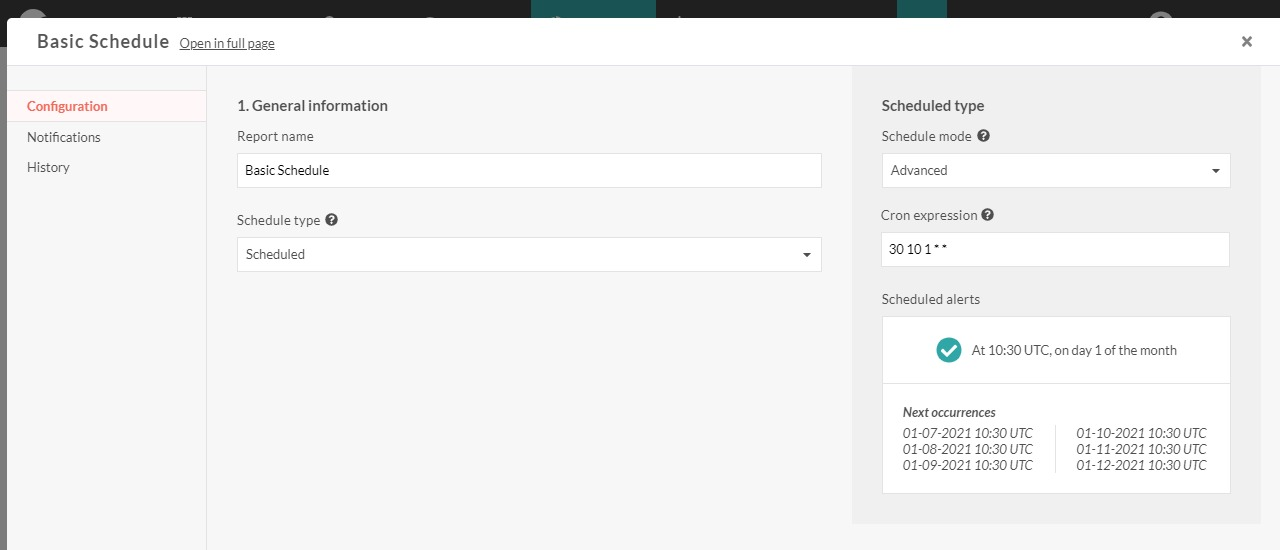
If you need a more customized schedule, then select Advanced in the Schedule mode drop-down.
A free expression field appears. Fill it using cron syntax.
Tip
Learn more about cron.
Granularity
The granularity is the time period for which data will be verified.
Aggregation
If during this period more that one datapoint is received, the data will be aggregated based on your choice in the Aggregation field.
AVG: average value of the data points
Count: count the number of data points
MAX: maximum value of data points out of all values of all data points
MIN: minimum value of data points out of all values of all data points
STDEV: standard deviation
SUM: sum of all values of all data points
VAR: variance
Enable alert
By default the alert is enabled. If you want to disable it set the switch to disable. You can also enable and disable the alert directly in the Alerts page.
Once the information are filled, click on the Save button. Your alert is created.
You can now define how and who wants to be notified when the alert is fired.
Tip
Learn how to add notifications, exceptions or how to link your alert to a schedule