Exceptions
Exceptions allow you to configure a period where you want to "deactivate" the alert.
Important
Alerts will be decommissioned this year, in favor of alarms, which are more efficient and offer greater functionality.
Learn more about alarms.
So if you know that there is a planned maintenance on a building, you can add that in the configuration of the alert to prevent it from being raised.
Let's go back to the use cases and see how it would behave.
Exceptions will be represented as a purple band on the timeline.
Exceptions in the different types of alerts
Exceptions in Raw alerts
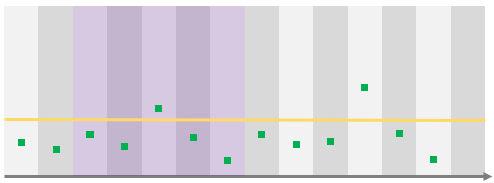
In this case we have 2 datapoints above the threshold. However, one of those is located during an exception.
As a result, only 1 alert will be raised.
Exceptions in Rolling alerts
The important information to understand is that only the date of the datapoint that triggered the alert verification is taken into account to decide whether or not we are in the condition of an exception.
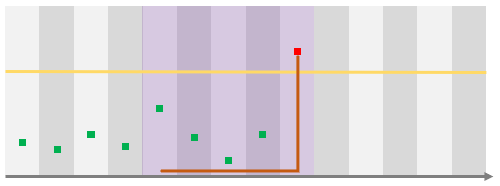
In this case, the result should raise an alert but as it was triggered by the last datapoint (in red), it means that it will be ignored.
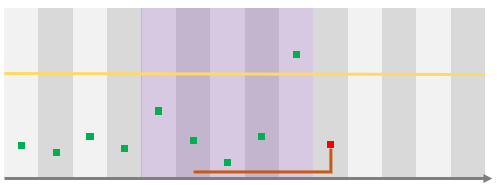
Here, the datapoint that triggered the alert is outside of the exception range, which means that the alert will effectively be evaluated and, in this case, it will be raised as there is a datapoint above the threshold on the rolling period, event though that datapoint is in the exception period.
Warning
You have to take that information into consideration while configuring your alerts in order to prevent unwanted results.
Exceptions in Scheduled alerts
The behavior for Scheduled alerts is very similar.
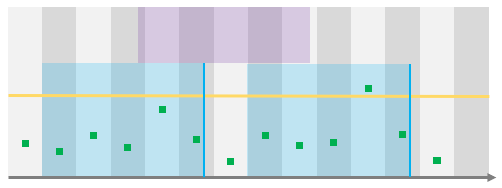
In this case, you can see that the first occurrence of the scheduled alert falls into an exception. The alert is then ignored.
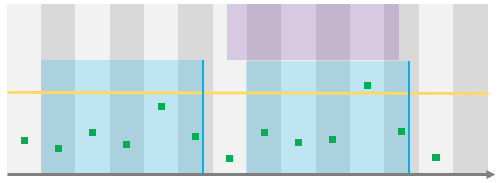
Here the alert will be triggered and raised as there is a point above the threshold, event though this point falls into the period of the exception.
Define an exception for an alert
You can define an exception while creating an alert or for an existing alert.
To do so, click on the alert concerned to open the 'Edit Alert Settings' window pop-up and go to the tab 'Exceptions'.
Click on te button 'Add another exception' which will add a new row in the exception table.
Two fields need to be fulfilled :
Period : you can choose, through the date picker, the period in which the exception will be active. Reason : this textbox allow you to indicate the reason of the exception.
Edit an exception
In order to edit an exception, you just have to click on the field you want to update and change the value as needed.
Then, click on the 'save' button.
Delete an exception
To delete an exception, you just have to click on the cross at the end of the row of the exception concerned.
Then, click on the 'save' button.
