Schedules in the alerts
The integration of the schedules in the alerts are a way to exclude datapoints based on a time factor.
Important
Alerts will be decommissioned this year, in favor of alarms, which are more efficient and offer greater functionality.
Learn more about alarms.
Schedules can be defined at site level or at account level.
Note
We highly suggest you to read the documentation for the site schedules or for the account schedules before you start integrating those in the alerts.
If we take the example of a schedule defining the opening hours of a shop (with a level "open" and a level "closed"), we could create an alert for the electricity consumption to verify that it does not go above a certain threshold while the shop is closed, i.e. for all the datapoint that falls in the level error.
Note that, as opposed to the Exceptions, schedules are inclusive. In other words, you define which datapoints should be included in the check.
Let's use this example schedule with our use cases to see how it would behave. The schedule levels will be shown in green bands
Schedules and Raw alerts
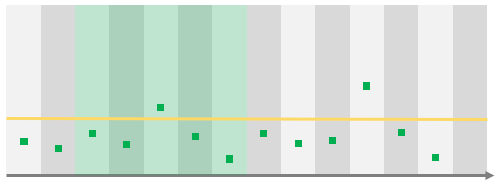
As the selected schedule level is inclusive, in this case, the alert will be raised only once, for the datapoint in the green background.
Schedules and Rolling alerts
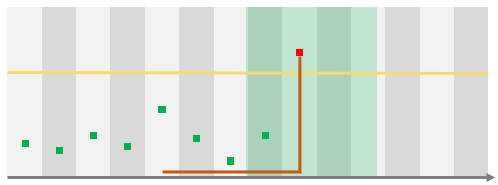
In this case, the alert will be evaluated and, as the datapoint above the threshold falls in the period of the selected schedule level, it will be raised.
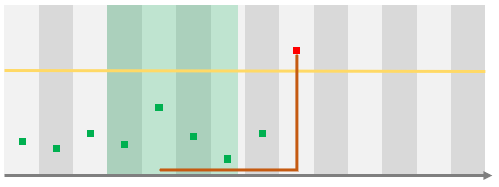
In this case, the schedule level does not include the datapoint that violates the threshold and thus, the alert will not be raise.
Scheduled alerts and schedules
The principle here is the same.
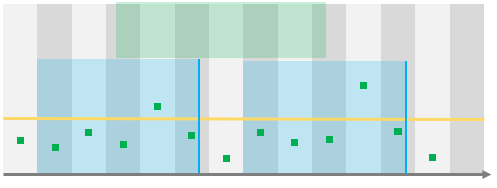
So in this case the alert will be evaluated twice (once for each occurrence of the schedule) but as the selected schedule level covers only a part of the datapoints, only the first one will actually raise the alert.
Schedules and Exceptions
It is important to note that the exception will always take precedence over the schedules.
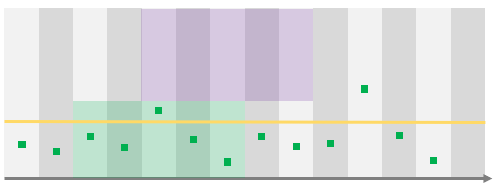
In this case, no alert will ever be raised as the only datapoints that are used for the check the ones in the period of the schedule level (green band) but the one datapoint violating the threshold is covered by an exception.
Define a schedule in an alert
To do so go on the Alerts page, create an alert or open an existing one, and click on the Schedules tab.
To choose when the alert should be active, click on the drop-down, and select the schedule you need. Then the levels will be displayed, click on the one you needs. You can choose several levels if needed.
To activate the alert don't forget to click on the activation switch before clicking on the Save button.
Tip
Learn more on alerts
