Sites schedules
A schedule is a timetable that can be defined for a site (e.g. the opening hours of the building). This schedule can be used for the calculation of the alerts or for the configuration of a system for the regulation of temperatures.
Create schedule
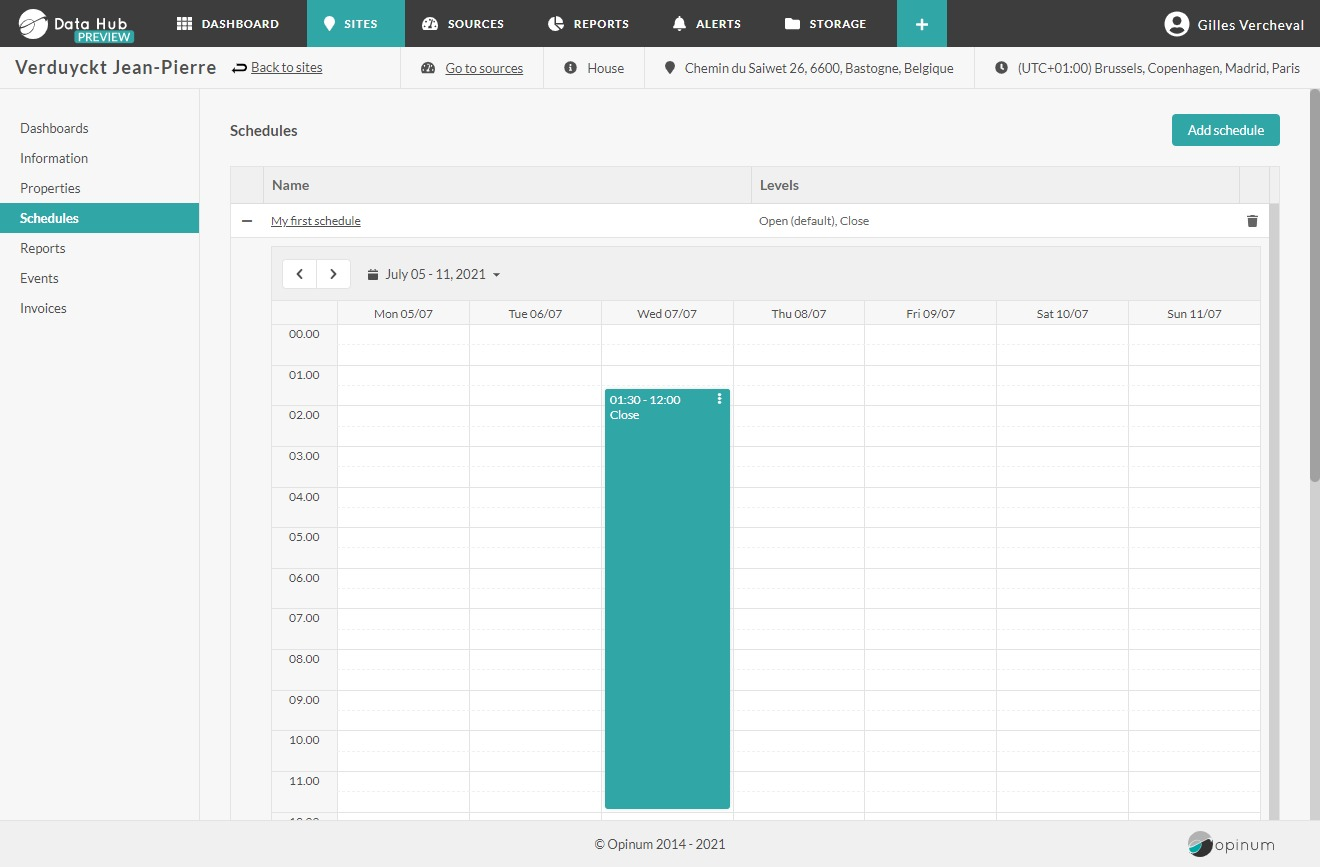
To define a schedule for a site, go on the Sites page, select your site and click on the link. The Sites details page opens. Click on the Schedules tab.

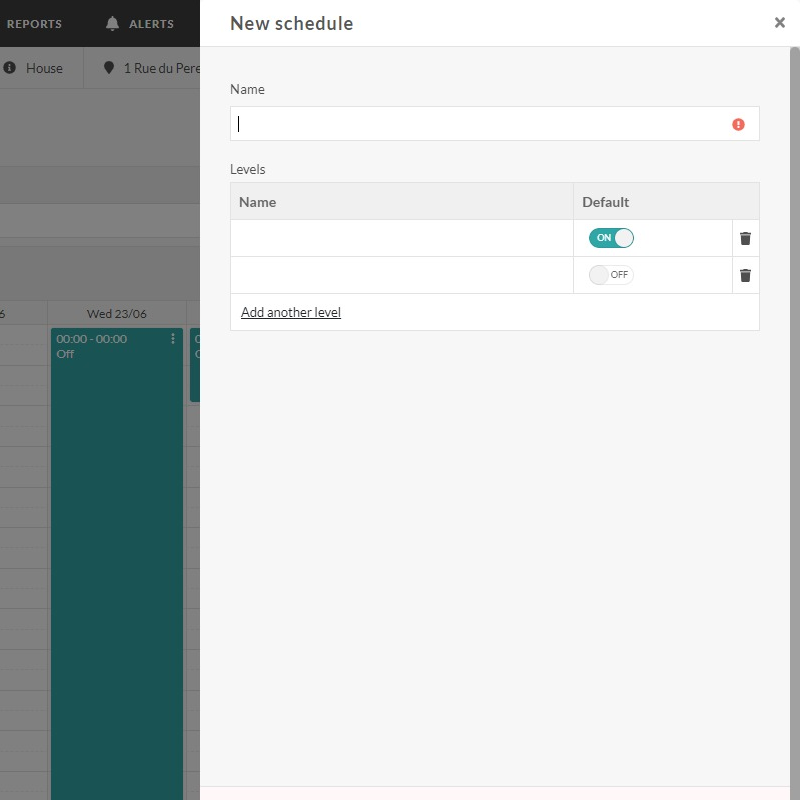
Click on the button “Add schedule” in the top right corner. The Schedule pop-up appears.

Fill the fields:
- Name: encode the name of the schedule
- Levels
- Name: name given to the level (e.g. open, closed, pre-heat, heat,…)
- Value: this field is only relevant in case you can control your heating installation. In this case, fill in a temperature. In all other cases, please fill in the value “1”.
- Default: select the level per default (e.g. open = Yes)
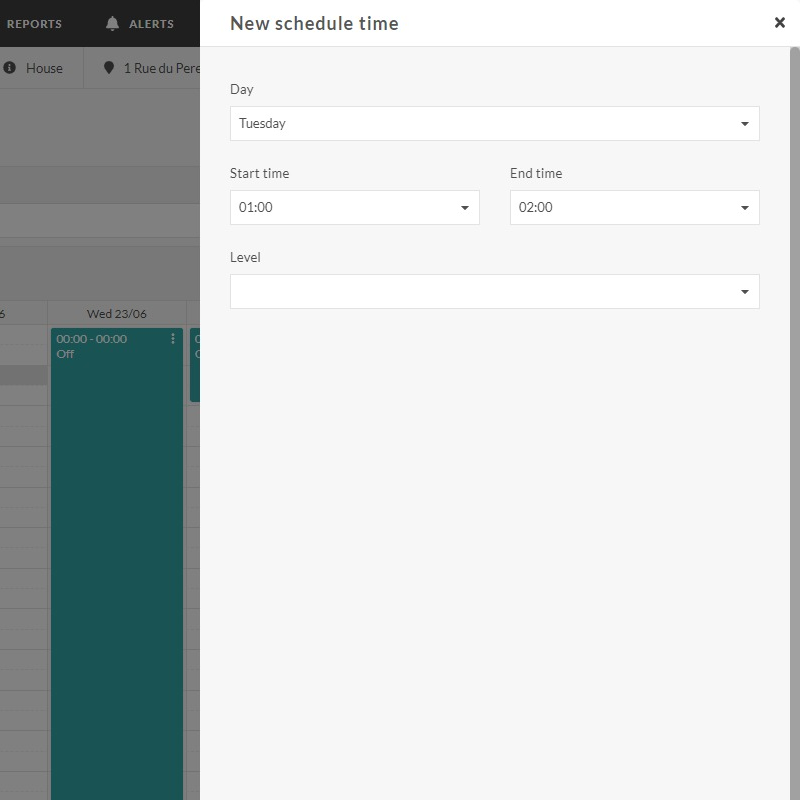
Click on the Save button. Your new schedule was created. Now you can add Schedule time by clicking on the grid calendar your date and start time. The popup opens with pre-filled fields.

Click on the column of a specific data in order to define the start date and end date for a specific level and click on the Save button.
This schedule will apply automatically on all weeks (previous weeks and future weeks).
Note
At this moment, it is not possible to define different schedules for different weeks.
Note
Schedules are always defined in UTC.
Manage schedules
Once schedules are created they can be edited and deleted.

Edit schedules
To edit a schedule, click on the schedule name displayed on. The Schedule pop-up will be displayed. Edit your fields as needed and click on the Save button.
If you need to change the content of the schedule time just click on the three white dots on the schedule time box, and edit the timetable.
Delete schedules
To delete a schedule, click on the Trash bin icon displayed at the right of the schedule box. A confirmation pop-up will be displayed. Click on the button Confirm to delete the schedule.
Warning
When a schedule is deleted, the data can't be retrieved.
Use schedule in alerts
The schedule can be used to define the period during an alert should be active.
Tip
Learn more about using schedules in the alerts
Export schedules in reports
The schedule can be exported in a report. The schedule will be displayed in a dedicated sheet in the Excel reports, and in a dedicated page in PDF reports.
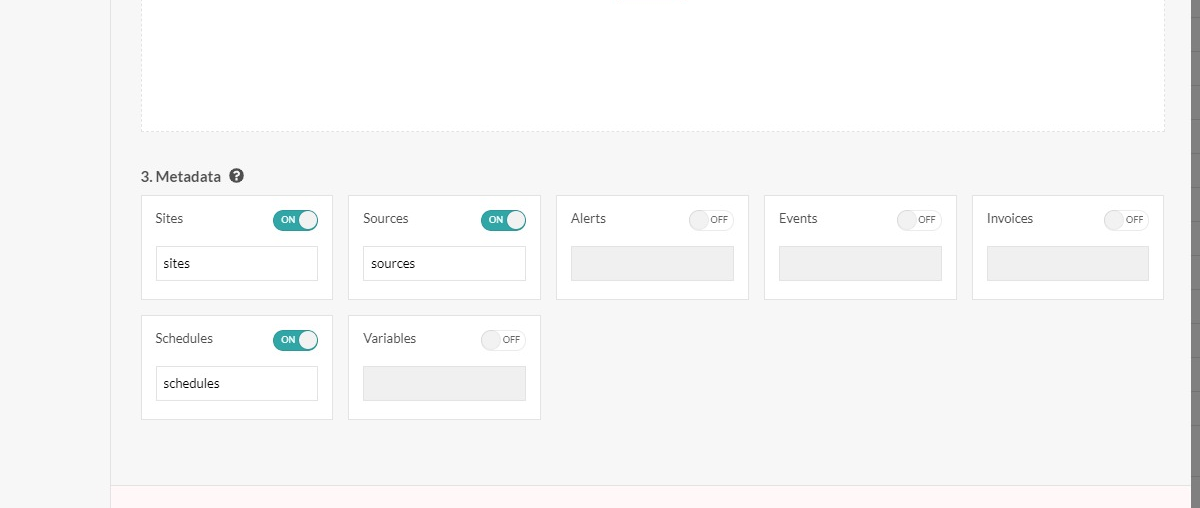
Go on the Reports page and create or open a report.
In the Metadata section, switch ON Include schedules and fill the name of the sheet.

Click on the Save button.
Tip
Learn more on reports
Schedules on account level
Schedules can also be set on an account level.
Tip
Learn more on schedule at account level
