Manage sources
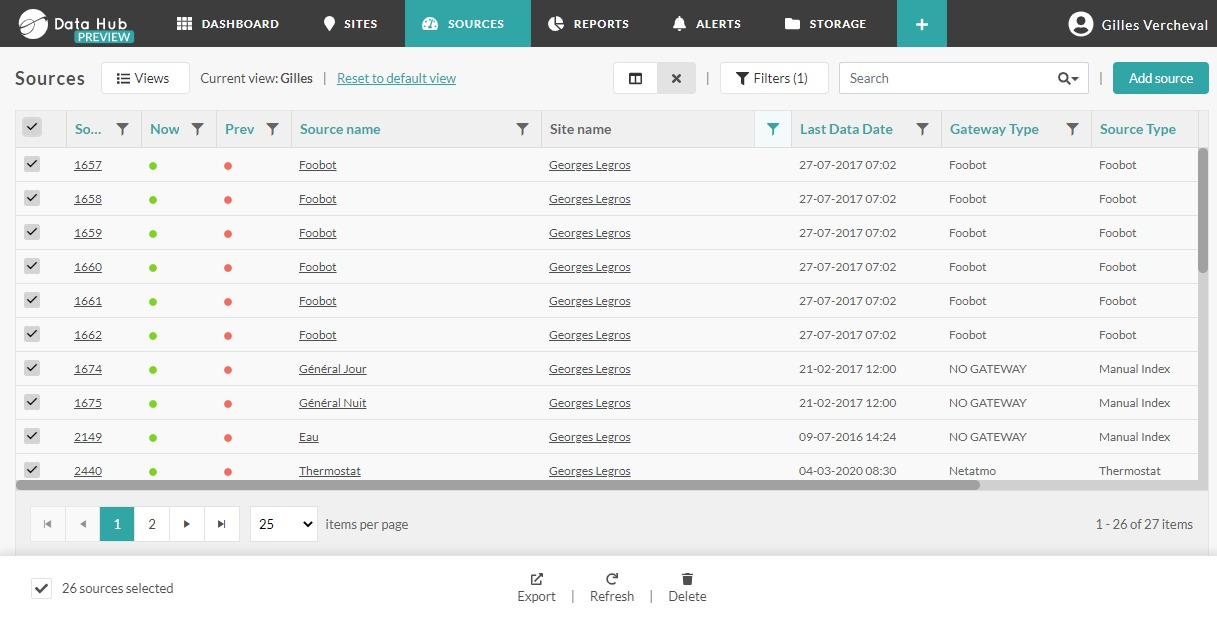
Sources are displayed and can be managed in the Sources page in Opinum Data Hub. You can customize the information displayed on this page, and save it as views. A view is a set of sources saved as you sorted, filtered and displayed them. Views can be used in reports and dashboards and can also be shared across all the users of an account.

Customize Sources page display
Each users will see the list of sources which he has access to.
Choose columns
The following information can be displayed in the Sources table:
- ID, EAN, Meter number, Serial number, name, Site, Gateway type, Source type, tags;
- Custom fields (forms data) created on sources;
- Sources status information:
| Color |  |
 |
 |
 |
|---|---|---|---|---|
| Meaning | Data received | Data missing | No verification has been done | Source for which we do not expect data |
| Filter | Valid | Invalid | Not checked | No data |
Note
The forms on Site are not available yet to be displayed in this page
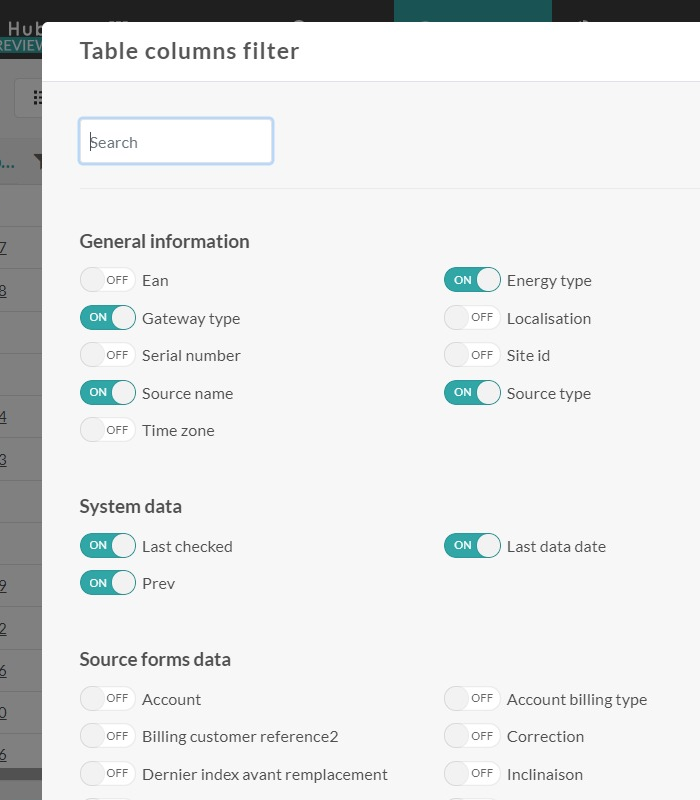
To choose columns displayed, click on the Actions menu > section Based on current view > click on Choose columns. The Table columns filter pop-up opens, just select the columns you want to display.
Sort columns
Data can be sorted with a click on the header of the columns Id, EAN, Meter number, Serial number, Now, Prev, Name, Last data date, Source type, Last checked.
Filter columns
Data can be filtered with a click on the wheel icon of each column. According
Advanced search
At the top of the page, you can search sources with a custom filter query syntax. Learn more about the syntax to use.
Reset display
You can reset the display of the page in the Actions menu:
- Clear all filters: reset the Sources page in initial set up, without any views, sorting and filtering.
- Reset columns setting: display the columns in initial set up, with the initial width and order.
Use sources views
Create views
Set up of the columns, sorting and filtering can be saved in a View by clicking on the Save button.

Each view of a user must have a unique name.
A view can be saved as by changing its name in the Save view pop-up that can be opened with the Save button or the Edit icon of the view.
Share views within the account
A view can be shared within an account by activating the switch in the Save view pop-up that can be opened with the Save button or the Edit icon.
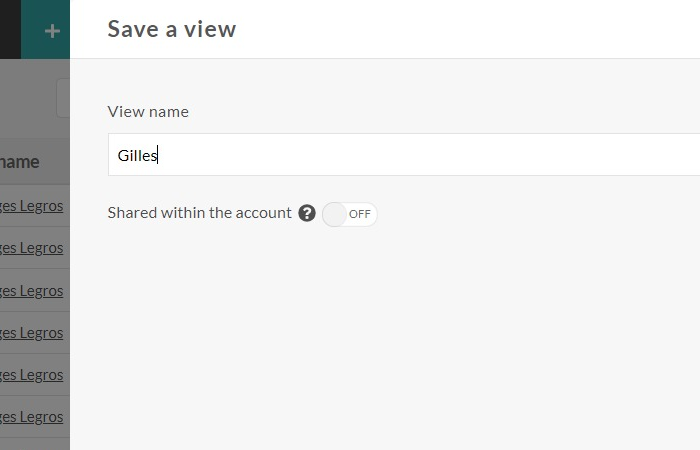
A shared view will be displayed in the Views drop-down of all the users of the account, in Read only mode. All the users will be able to create reports and dashboards based on this shared view, and will see all the sources of the view in the report.
When a report or a dashboards use a public view, this view can’t be delete or un-shared within the account.
Note
The use of views of sources in alerts and calculated variables is not available yet.
Manage views
Actions you can do on each view are available in the Views drop-down, at the top left of the page.
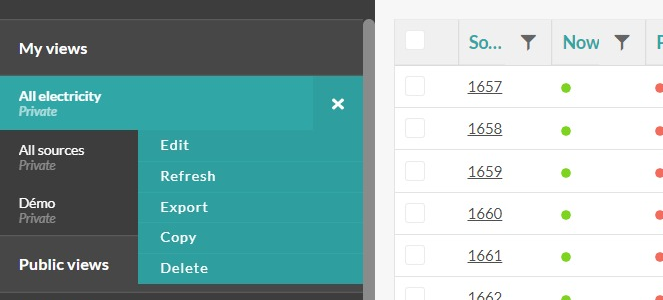
- Edit the name of the view and (un)shared the view within the account.
- Duplicate the view.
- Delete the view. If the view is shared within the account and used in a report or a dashboard by another user it can't be deleted.
Bulk actions
From this Sources page you can run several bulk actions on several sources or in the Actions menu, or by selecting at least 2 sources.
Add a new source
You can create a new source from the Actions menu. Learn more about sources creation.
Create report
Open the report scheduling settings pop-up and enable to add data based on view sources.
Refresh data
Refresh data of all the sources of the view.
Export data
Download a .CSV file with the data of the sources. You can download the data from all the view in the Actions menu, or from several checked source in the bottom menu.
Delete sources
Select the sources you want to delete. The bottom menu will appear, click on the Delete button.
Warning
When a source is deleted, all the datapoints of the source will be deleted as well. The data can't be retrieved.
