Webhooks
The purpose of this feature is increase the information exchange that is currently possible.
Users are able to define Webhooks for four types of events:
- Alerts notifications
- Data Quality notifications
- MasterData
- Sources CRUD
- Standard data file
Those will be configured the same way as we configure the Email and SMS notifications.
In this version, users will have to create the structure of the HTTP POST that will be made.
Security considerations
The CRUD operations are only available for Manager. Users are only able to retrieve the list of configured Webhooks to use them in Alert and Data Quality notifications.
The “Secret” flag of webhooks headers allows to declare a header value as sensitive, with the consequence that once the value has been saved in the API, it will no longer be possible to retrieve it. This same concept has been applied to the “password” authentication field.
Failures and retry
When an error occurs, the system will automatically retry one time after 10 seconds then 4 times at 10 minutes interval. If the system encounters 5 errors consecutively, the webhook will be disabled in order. A manager has to fix the issue and can re-enable the webhook manually.
History retention
By default the webhook history is kept for 30 days. The retention period can be configured in hours or days. If the webhook is triggered many times a day, reduce the retention period so that the history is always available and does not overload the system.
Important
When the history is changed, it is applied on new occurences of webhooks, the history is not recovered or flushed.
User Interface Components
Account Settings

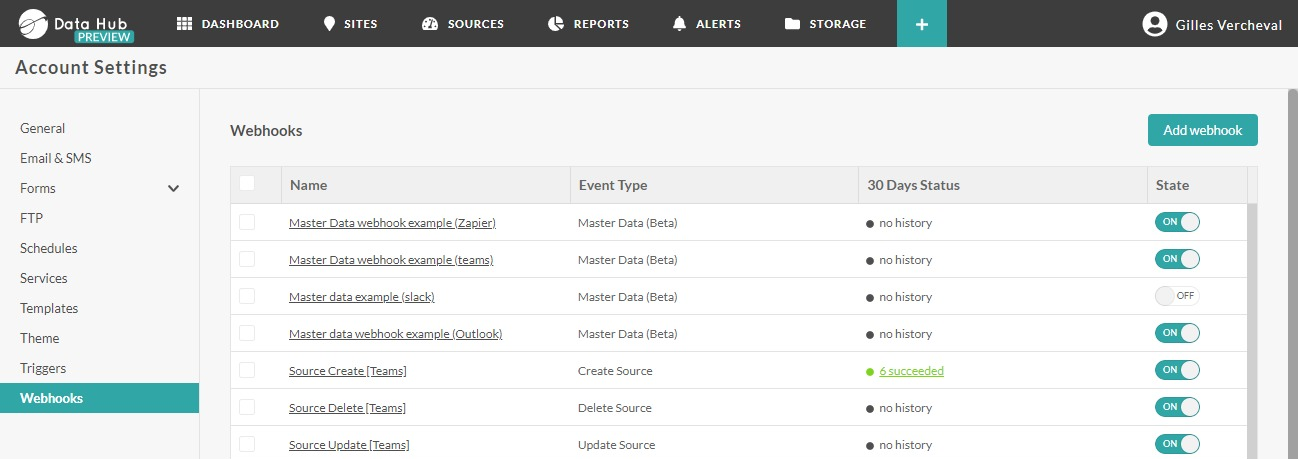
The configuration of the webhooks is done in the Account settings page. The webhook tab contains the list of webhooks and a button to create new ones. The table displays the following fields:
- The name of the webhook. Displayed as a link that opens the popup to edit the webhook
- Event Type: shows if the webhook is for Alert or Data Quality
- History: shows the amount of successful and/or failed calls to the webhooks in the retention period defined on each webhooks. By default the retention period is set to 30 days. After the retention period the call history is automatically deleted. The value is a link as soon as there is effectively some history to open the history modal.
- History retention period: shows the retention period of the webhooks, in hours or days. The maximum retention is 30 days.
- State: shows if the webhook is enabled or disabled. Not that a webhook can be disabled by the system if it fails 5 time consecutively
- Delete button.
Webhook

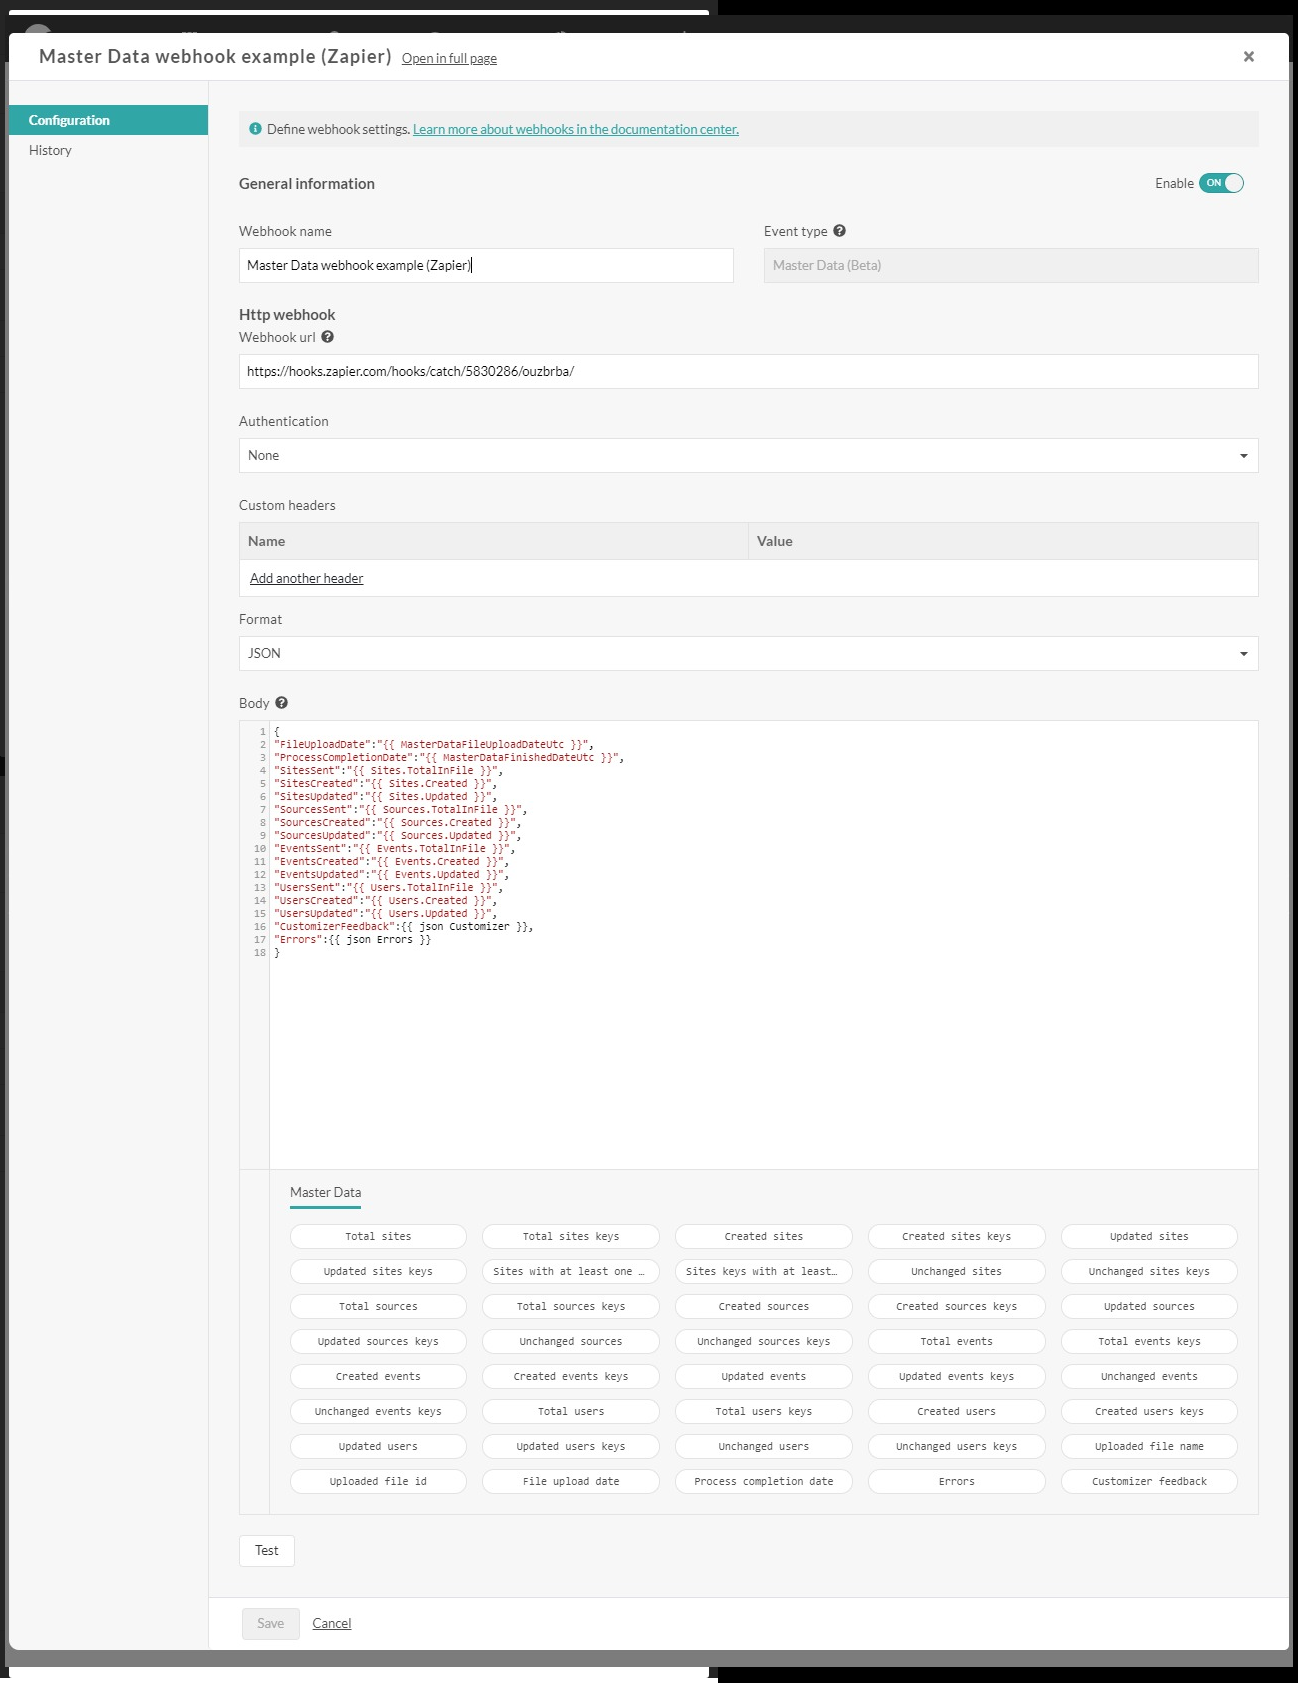
The popup lets you specify the information that we need to perform the HTTP request.
In terms of authentication, we only support Basic authentication (or no authentication at all).
A custom header can be added, and its content can be protected and hidden for security reason.
You can also choose to send the data in JSON or XML. In this case the body editor will use the proper syntax highlight and the according Content-Type header will be set on the request.
Below the body editor is a list, organized by entity, of the different fields placeholders that you can add on the body. To add a field, position the cursor where you want in the body and click on the corresponding button.
Finally, there is a test button that allows you to validate your configuration before saving.
Secret header
The effect of this flag in the custom header is to declare a header value as sensitive, with the consequence that once the value has been saved in the API, it will no longer be possible to retrieve it. This same concept has been applied to the “password” authentication field.
As a result, from the moment you start using secret headers, you'll need to pay particular attention to how you apply modifications to them. The PUT is still available, but it requires the various secret values to be specified. These values are no longer available when retrieving a Webhook via the GET endpoint. We've therefore added a PATCH endpoint that must be used for all partial updates. The same principle applies to the test endpoint.
In parallel, webhook execution histories are now obfuscated to hide secret field values.
These changes have been made to enhance the platform's security and ensure that secret field values are not available to unauthorized users.
History

That popup lets you see the execution history of the webhooks for the last 30 days.
For each line on the left, you can see the request and the response
API Definition

The API contains all the operations that can be done through the UI.
Special note on the test endpoints. When you create a test with the POST, the API returns an ID that should be used in the GET which will either return 204 (No Content) if the test has not been executed yet or a object that is similar to a webhook history.
